One-click pause for easy multi-color printing and part embedding

One-click pause for easy multi-color printing and part embedding
In the 3D printing process, adding a pause print is a very practical function. With its help, users can use a single-nozzle printer to achieve a variety of printing needs . The following are some common application scenarios for adding a pause print :
l Multi-color printing : Manually replace consumables when printing is paused to make the model more colorful.
l Parts embedding : Place magnets, electronic components and other parts in the reserved space inside the model to expand the model's functions .
QIDI Studio provides a convenient function to add a pause printing function , allowing users to pause according to different needs . This tutorial will introduce in detail how to perform related operations in QIDI Studio to help you print the ideal model.
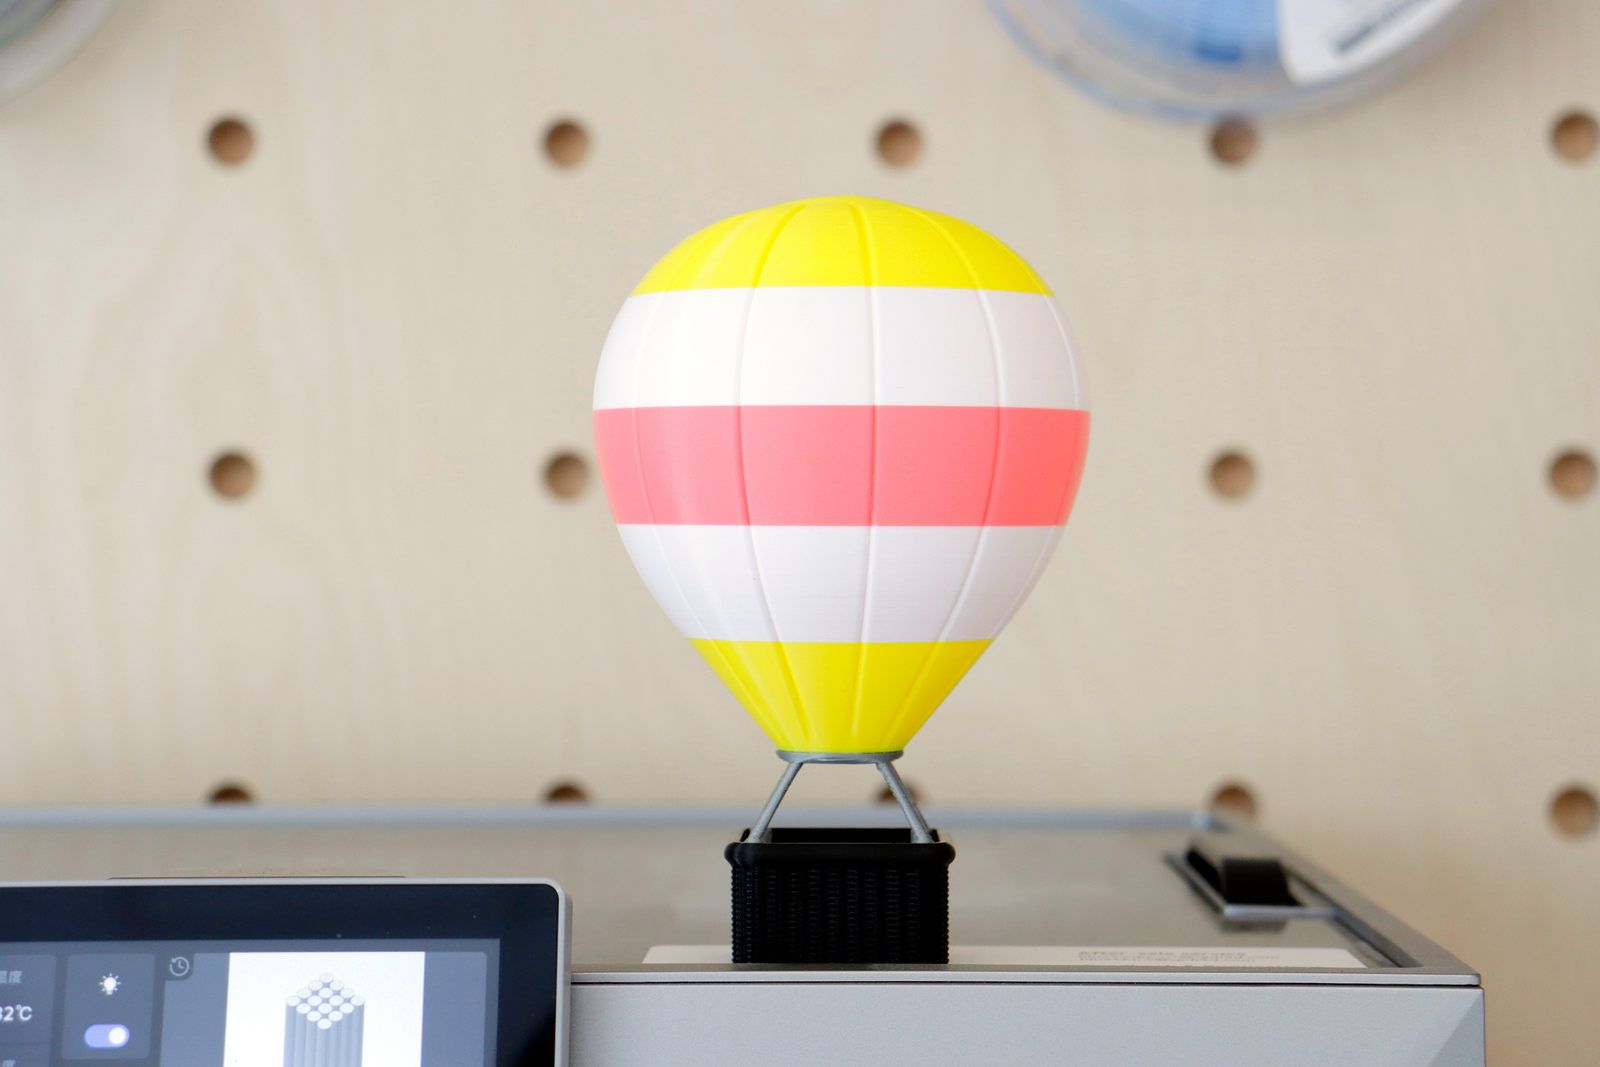
Schematic diagram
Multi-color printing model :

Embedded parts and multi-color printed models :

If you want to achieve a similar effect, follow the steps below .
Operation Introduction - Multi-color Printing
1. Select the model you want to add to pause printing and click Slice plate .

2. Move the "+" sign on the right side of the print progress bar to see the model's status at the corresponding print time and number of layers. At the location where you want to pause printing, right-click the "+" sign and select "Add Pause" to insert a pause at the beginning of the layer. After adding all the locations where you need to pause, you can transfer and print.


3. Taking QIDI Plus4 as an example, when printing is paused, the printer display is as shown below. At this time, we can manually replace the consumables of other colors.

4. After the filaments are loaded, click Continue Printing. Repeat the above steps to print out hot air balloon models with different colors.

Operation Introduction -Part Embedding
In actual printing, users may need to embed various parts in the model. Here, a puppy model is used as an example to demonstrate how to design it into a refrigerator magnet that can be concealed with magnets.
1. Select the model where you want to embed the part, right-click and select "Add Negative Part", such as selecting a cylinder based on the shape of a magnet.

2. Adjust the size and position of the negative part. It is recommended to adjust the size of the negative part to be slightly larger than the actual part to avoid the embedded part hitting the print head.


3. Click Slice to see the specific location of the negative part in the model. The existence of the negative part means that a groove will be formed near the bottom surface of the model when it is printed.

4. Move the "+" sign on the progress bar, pause when it reaches the surface of the cylindrical negative part, right-click and select "Add Pause". After adding, the model can be transferred and printed.

5. When the machine pauses printing, put a magnet in the groove. Then click Continue Printing, and you will get a refrigerator magnet model with suction force.
Conclusion
By adding pauses in QIDI Studio , you can easily print more complex and diverse models , greatly improving design and printing efficiency. What other models have you printed? What problems have you encountered? Welcome to join the QIDI 3D Printing Community and share your experiences and insights!